How to Manage Cost Codes
Step-by-step guide to set up and use cost codes for accurate construction project cost tracking
What This Feature Does
Cost codes help you track and categorize expenses for construction projects, enabling accurate job costing, budget monitoring, and profitability analysis across different types of work.
Initial Setup
First-Time Configuration
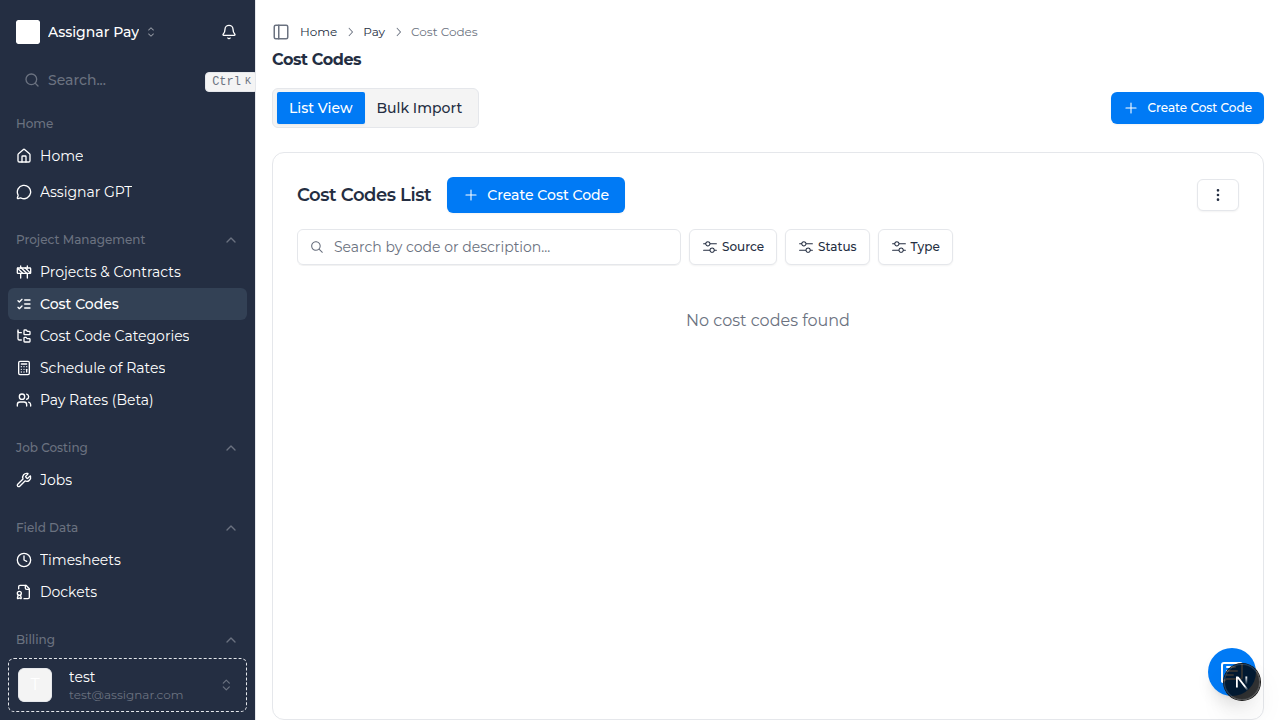
- Navigate to "Cost Codes" by clicking "Cost Codes" in the left sidebar
- You'll see the cost codes management interface with list and bulk import options
- Choose your setup method:
- Manual Entry: Create cost codes one by one
- Bulk Import: Upload multiple cost codes from spreadsheet
- Assignar Import: Import existing activities and tasks from Assignar
Required Information
Before you begin, make sure you have:
- List of work types and activities for your projects
- Categories to organize your cost codes (e.g., Labor, Materials, Equipment)
- Unit types for each cost code (hours, square meters, cubic meters, etc.)
- Default pricing for common activities
Day-to-Day Usage
How to Create a Cost Code Manually
- Go to "Cost Codes" in the left sidebar
- Click "Create Cost Code" button in the top right
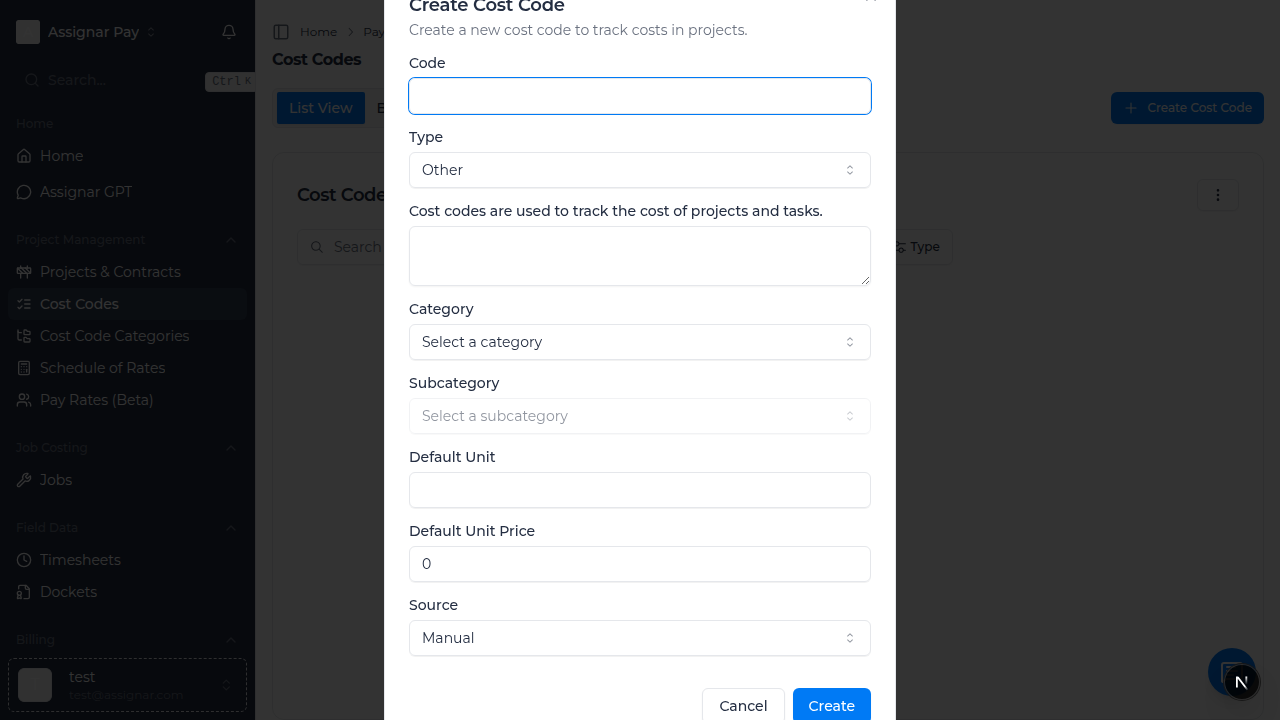
- Fill in the cost code details:
- Code: Enter a unique identifier (e.g., "LAB001" for labor codes)
- Name: Descriptive name (e.g., "Carpenter - Formwork")
- Category: Select or create category (Labor, Materials, Equipment, etc.)
- Subcategory: More specific grouping (e.g., "Skilled Labor", "Concrete Work")
- Description: Detailed description of what this code covers
- Type: Select "Billable" for client chargeable work or "Non-billable" for internal costs
- Set unit pricing:
- Default Unit: Choose measurement (Hours, Square Meters, Linear Meters, etc.)
- Default Unit Price: Enter standard rate (e.g., $85.00 per hour)
- Set status to "Active"
- Click "Save Cost Code"
How to Import Cost Codes from Assignar
- Go to "Cost Codes" and click "Import Assignar Activities" or "Import Assignar Tasks"
- The system will connect to your Assignar integration
- Select which activities or tasks to import:
- Review the list of available Assignar activities
- Choose specific items or select all
- Preview how they'll be mapped to cost codes
- Click "Import Selected Items"
- The system will create cost codes with default categories
- Review and update categories and pricing as needed
How to Use Bulk Import for Cost Codes
- Navigate to "Cost Codes" and click "Bulk Import" tab
- Download the bulk import template:
- Click "Download Template" to get the Excel/CSV format
- The template shows required columns: Code, Name, Category, etc.
- Fill in your cost codes in the spreadsheet:
- Code: Unique identifier for each cost code
- Name: Descriptive name for the activity
- Category: Group similar codes together
- Subcategory: More specific classification
- Default Unit: Unit of measurement
- Default Unit Price: Standard pricing
- Billable: TRUE/FALSE for client chargeable work
- Status: ACTIVE/INACTIVE
- Upload your completed file:
- Click "Choose File" and select your spreadsheet
- Click "Upload and Import"
- Review any validation errors and fix them
- The system will create all cost codes at once (maximum 100 per import)
Common Tasks
Organizing Cost Codes by Construction Trade
- Create categories for each major trade:
- Labor - Concrete: Concrete workers, finishers, pump operators
- Labor - Electrical: Electricians, apprentices, testing technicians
- Labor - Plumbing: Plumbers, pipe fitters, gas fitters
- Materials - Concrete: Ready mix, reinforcement, additives
- Materials - Electrical: Cables, switches, fixtures, panels
- Equipment - Earthmoving: Excavators, bulldozers, compactors
- Use consistent coding patterns:
- LAB-CON-001: Labor - Concrete - Skilled Worker
- MAT-ELE-015: Materials - Electrical - Copper Cable
- EQP-EAR-003: Equipment - Earthmoving - 20T Excavator
Setting Up Project-Specific Cost Codes
- For large projects, create specific cost codes:
- Include project reference in the code
- Use location-specific descriptions
- Set project-specific rates if different from standard
- Example for "Downtown Office Project":
- DTO-LAB-001: Downtown Office - Carpenter - Level 1
- DTO-LAB-002: Downtown Office - Carpenter - Level 2
- DTO-MAT-001: Downtown Office - Concrete - Foundation
- This allows detailed cost tracking per project area
Managing Cost Code Categories
- Go to "Cost Code Categories" in the sidebar (or via Cost Codes menu)
- Click "Add Category" to create new groupings:
- Category Name: e.g., "Site Preparation"
- Description: What types of work this covers
- Color Code: Choose color for visual identification
- Create subcategories for detailed tracking:
- Site Preparation > Demolition
- Site Preparation > Excavation
- Site Preparation > Site Access
- Assign cost codes to appropriate categories for better organization
Advanced Cost Code Management
Setting Up Unit Types for Construction
- Configure appropriate units for different work types:
- Labor codes: Hours (for time-based work)
- Concrete: Cubic meters (m³)
- Reinforcement: Tonnes (T) or Kilograms (kg)
- Formwork: Square meters (m²)
- Painting: Square meters (m²)
- Electrical: Linear meters (lm) for cable, Each (ea) for fixtures
- Plumbing: Linear meters (lm) for pipes, Each (ea) for fittings
Integrating Cost Codes with Timesheets
- When workers log time, they select appropriate cost codes
- This automatically categorizes labor costs by activity type
- Reports show actual costs vs. budgeted costs per activity
- Use this data for future project estimating
Cost Code Pricing Strategies
- Standard Rates: Set default pricing for common activities
- Project Rates: Override pricing for specific projects or clients
- Market Rates: Update pricing based on current market conditions
- All-inclusive Rates: Include overhead and profit margins
- Regular review and update of rates to maintain profitability
Troubleshooting
If cost codes aren't appearing in timesheets
- Check that cost codes are set to "Active" status
- Verify workers have permission to use specific cost codes
- Ensure cost codes are assigned to the correct projects
- Check that the cost code type matches the work being done
If bulk import fails
- Verify the spreadsheet format matches the template exactly
- Check for duplicate cost codes (codes must be unique)
- Ensure all required fields are completed
- Check that unit types are from the approved list
- Limit imports to 100 cost codes maximum per upload
If Assignar import doesn't work
- Verify your Assignar integration is connected and working
- Check that you have activities/tasks in your Assignar system
- Ensure your Assignar account has the required permissions
- Try importing a smaller subset first to test
Tips for Construction Teams
- Start with broad categories and add detail as needed
- Use consistent naming conventions across all projects
- Include location or trade information in cost code names
- Regularly review and update pricing to reflect current rates
- Train workers on selecting appropriate cost codes for accurate tracking
- Use billable vs. non-billable flags to separate client work from overhead
Best Practices for Cost Code Setup
Naming Conventions
- Use clear, descriptive names that workers will understand
- Include trade or activity type in the name
- Keep names consistent across similar activities
- Avoid abbreviations that might confuse users
Category Organization
- Group related activities together
- Use hierarchical structure (Category > Subcategory)
- Align with your company's chart of accounts
- Consider how you want to report costs
Pricing Management
- Set realistic default prices based on actual costs
- Include allowances for overhead and profit
- Update prices regularly based on market conditions
- Consider regional differences for multi-location companies
What's Next
After setting up cost codes, you may want to:
- Configure Timesheets to use your cost codes
- Set up Projects with appropriate cost code assignments
- Create Reports to analyze cost performance
- Configure Pay Rates that align with your cost codes